Wednesday 29 January 2014

The Making of Ruby - Part 2

Part 2
Following a couple of weekends away (we will also get some posts up about this soon!) it was clear that we were a little light on for extra storage. The 76 is a relatively small vehicle inside and bulky or awkward items such as swags, shovels, fishing rods and spare tyres were taking up too much room, or risking damage to the gear, us, or car itself by having them inside the cabin. As a result we needed to make a decision on how to carry this equipment. With a second spare tyre a mandatory inclusion for us, this became a key issue, with a couple of solutions being considered.
We looked into mounting a rear bar with dual wheel carriers onto the back of the car, this would sort the spare tyre issue out and also remove some weight from the rear door while providing better rear panel protection. However; we found that to secure a quality unit that these are VERY expensive (more than the cost of all of our other bar work combined!) We also considered modifying the camper to carry a second spare, but decided against this as it would have meant a custom fabrication of a carrier and had the potential to make it inconvenient to get into and out of the trailers storage compartment.

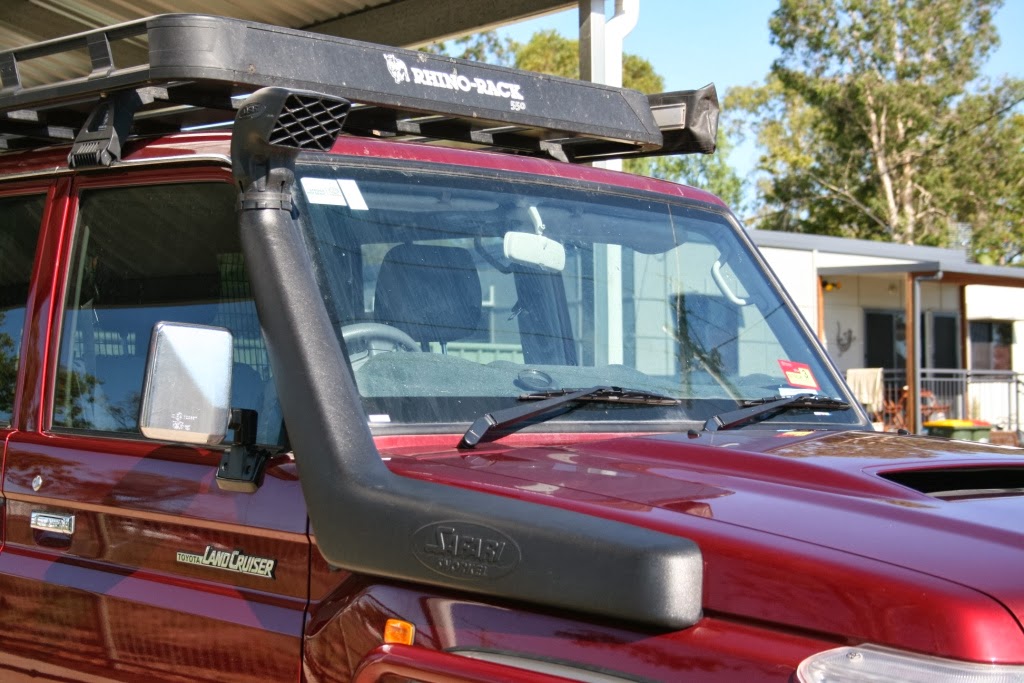
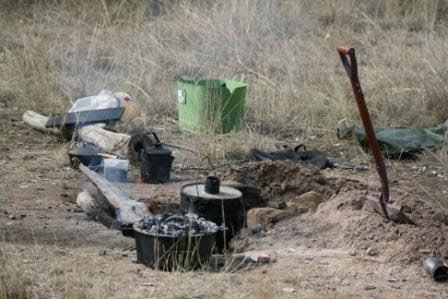
Rear awning on roof rack
 
All of this made a roof rack a pretty compelling decision; the next problem is which one! Almost every major 4x4 accessory supplier makes a roof rack, with cost, materials and quality varying greatly between models and brands. The first decision was Alloy vs Steel, Alloy is lighter, but in most cases has a lower carrying capacity for the rack itself. Whereas steel is heavy (meaning you take up more of your roof rated weight limit with the rack before you have added any extra equipment). We settled on a Rhino Rack unit, which is made of aluminum, but built to be heavy duty. We also decided against the traditional roof bars and basket configuration of Rhino Rack, opting instead for their new (at the time) Pioneer units, which are similar to other steel unit available on the markets in being permanently mounted complete units with the supports being contained in the tray of the rack rather than in separate roof bars. All roof racks for the 76 series are mounted in the gutters of the vehicles roof. One concern we had with many of the racks we looked at was that when there were not enough mounting points to spread the load evenly across the roof that the gutters can be damaged and lead to long term issues for the vehicle. The Rhino unit has well designed mounting clamps which spread the weight over a large area, and fix to the gutters in a way, where point loading is minimised. We have since added shovel holders, and side and rear awnings to the rack, further adding to its versatility for our needs.
 
Side awning on the roof rack

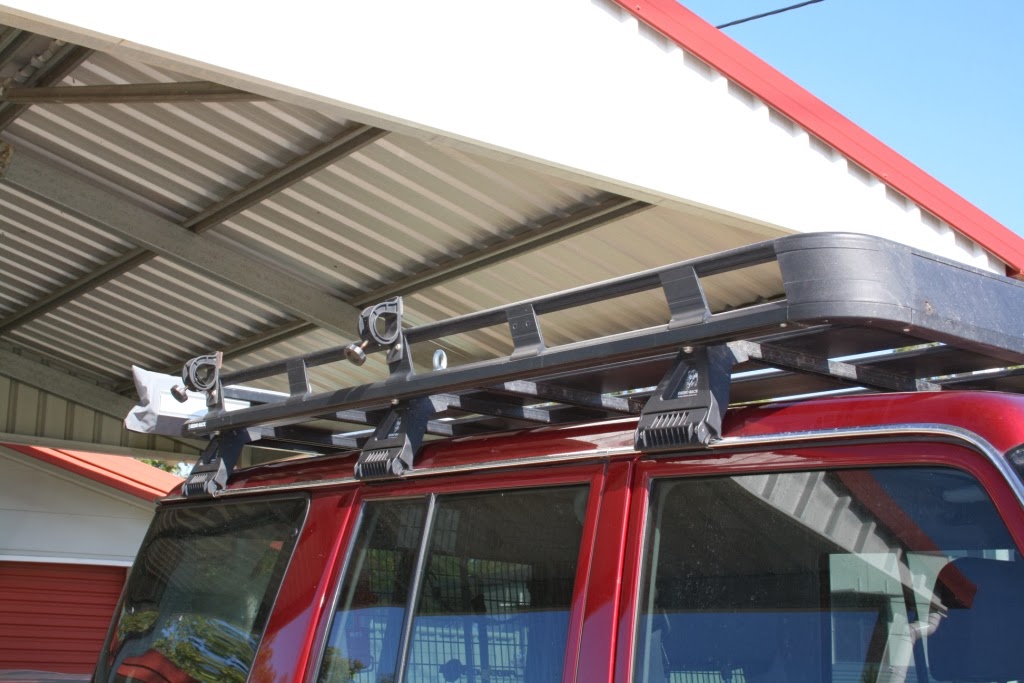
Rhino roof rack with shovel holder attached
 
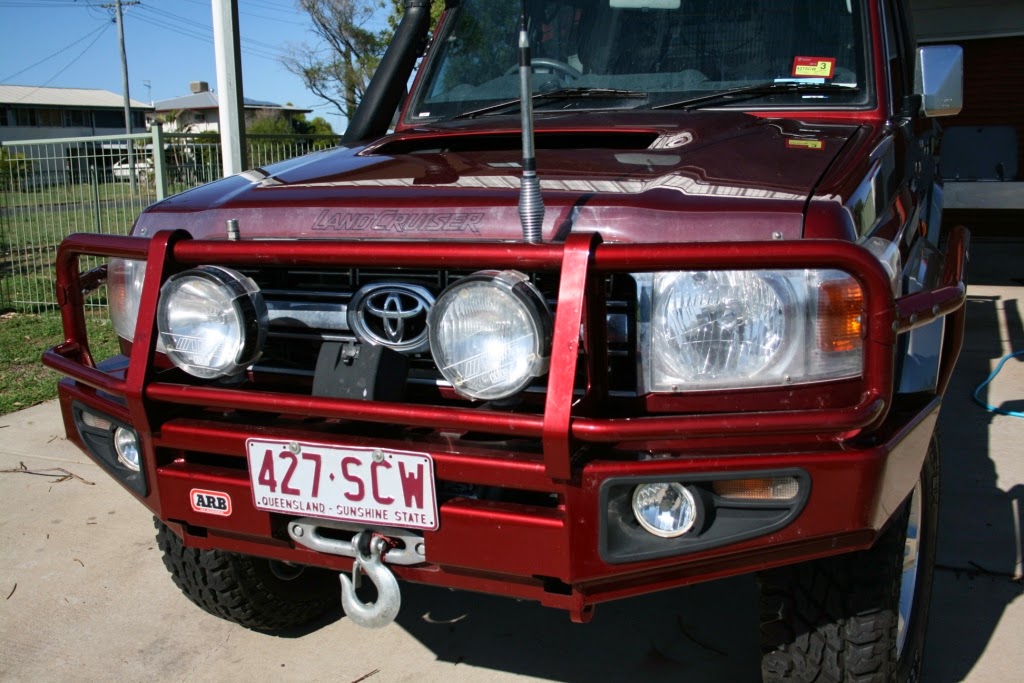
 As mentioned in our earlier post, it was always part of the plan to fit a winch to the car at some stage. However as we are not using the vehicle for extreme 4x4 and don’t intend on actively putting ourselves in situations where we know multiple recoveries will be required (which is very hard work with a trailer on!) we didn’t feel that we needed a top of the range winch. However with Ruby and the trailer weighting in at a combined 4.5 tonnes and Murphy’s Law meaning that we will need the winch when we least expect it, the unit had to be reliable and rated sufficiently to easily recover car and trailer when needed. We spoke to a number of people and read a lot of articles before deciding to fit a Tigerz11 12,000Lb Grande winch. Tigerz11 had a good deal at the time which made the cost of supply and fitting the winch the same as supplying one alone would have normally cost. We opted for synthetic winch rope over steel wire. This was both for safety reasons (synthetic rope is a lot less dangerous if it breaks in a recovery situation) and for ease of handling. As with all items on the market there are a lot of mixed reviews available on these winches. We are happy to report that after multiple uses that ours is still going strong! We have also found that the winch is very handy for moving trees off the track and can be used for an number of other bush mechanic fixes in an emergency.


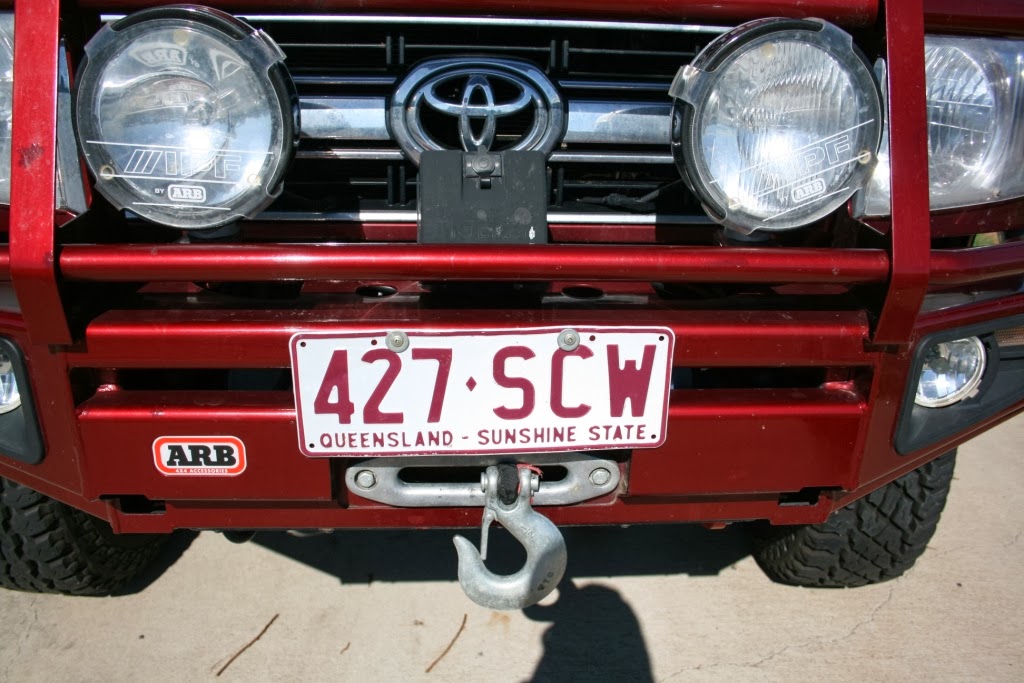
Winch in the ARB winch bull bar
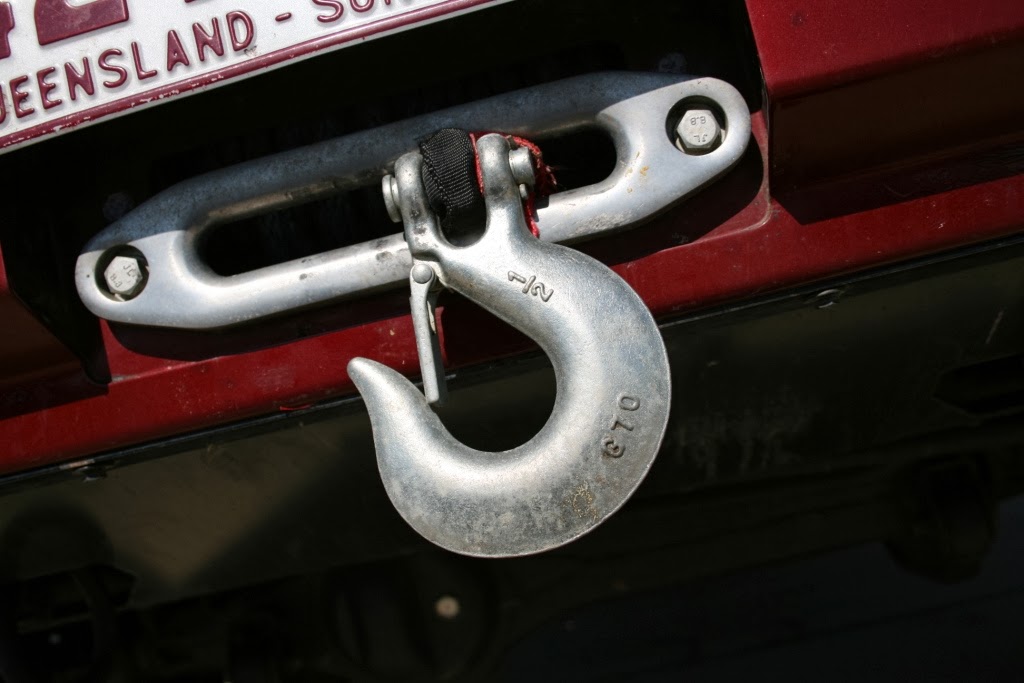
Winch

 
  Posted by Mat

Tuesday 14 January 2014

Camp Oven Bread

There is nothing better than freshly baked bread in the camp oven.  Once you have tried it, the memory will stay with you forever. The mixing of the dough, the kneading, the waiting for the dough to prove, the shaping, the second rise and then eventually getting it in the tin ready to cook, all while you are in your "bush" kitchen.  The anticipation of lowering it into the camp oven, putting the lid on and placing the hot coals on the oven and the the further wait, while the bread cooks, the smell sneaks out of the side of the camp oven, enticing you, making you hungry!

It is not a quick process, but it is so worth it.  Once you lift that camp oven lid and see your loaf of bread fully cooked, nicely browned, it is excitement beyond words.


Freshly baked bread straight out of the camp oven
 
But then there is another wait, waiting again while the bread cools enough so that you can slice it, but not to long, because the best way to eat the bread is still slightly warm, with lashings of butter.
 
Our favourite way of eating it, is warm with butter and golden syrup, it doesn't get more Australian than that, please give it a try, I promise you that memory will last with you throughout your life.

Ready to be sliced


Recipe
For this mix I just used a crusty white bread mix single 1 loaf serve.  We love to use the Laucke brand, as they always turn out well and they use beautiful Australian wheat to make their flour.  When we just go camping for a few days we just buy the single loaf mixes, but if it is for a longer trip we buy the bulk mix bags and store it in an air tight container.

I followed the instructions on the packet in this recipe.  If making my own from bread flour, I always add a teaspoon each of salt and sugar and about a tablespoon of olive oil to the mix and then the recommended water and yeast.  Once you have baked a few loaves of bread, you start to get the feel for how it should feel and how much water to add.

Directions
- Start by lighting your fire, we need some nice coals to bake our bread.  Hard wood obviously makes the hotter more consistent coals.
- Empty bread mix into a large bowl and add in the yeast and most of the water (leaving behind a little as we can add this later if needed).
- Mix to combine and start to bring the dough together, adding more water or flour as necessary.
- Knead the dough until it becomes elastic and springs back when pressed with your finger (I find this takes me about 10 minutes of hand kneading)
- I just leave my dough in the bowl and cover the bowl with either plastic wrap or a tea towel and place in a warm spot for about 30-60 minutes depending on the temperature (placing the bowl in the 4WD can be a good option as a warm place).
- Once the dough has proved, knock it back and then knead into the shape you require and place in your bread tin.
- Leave to rise for another 20-30 minutes.
- While the bread is on its final rise, pre-heat the camp oven with a trivet in the bottom, over the fire/coals.
- When the bread is ready to bake, place the bread tin in the pre-heated camp oven on the trivet and place the lid on the camp oven. 
- Place the oven over about a shovel full of coals and also add a shovel full of coals to the lid of the oven.
- Bake for about 40-50 minutes, checking at about 35 minutes to check progress and if you need to add or replenish the coals.
- To test if the bread is cooked, tap it to see if it sounds hollow, when it sounds hollow it is cooked.
- Remove the bread from the oven and remove from the bread tin and let cool on a cooling rack or trivet until cool enough to slice, or until you can't wait any longer to try it!

This recipe was also cooked in our Furphy camp oven.

Posted by Jess

Sunday 12 January 2014

The Making of Ruby - Part 1

Part 1
 
After we finally got Ruby home the real fun began! We had pre-ordered a lot of the accessories that we wanted to install, with a lot of the initial fit-out coming from the team at ARB in Rockhampton. We have used these guys on numerous occasions in the past, and have always been happy with the price, workmanship and attention to detail. This post concentrates on the external accessories we added first up. There will be another post shortly detailing the internal and electrical modifications!
In the lead-up to Rubys arrival Jess and I had many conversations about the colour of the vehicle, and then the bar work and other accessories . In the end we decided that we would colour-match the bullbar and side rails to Ruby’s factory paint job. We opted for the Deluxe ARB winch bar, as it was always the intention to fit Ruby with a winch, as when we are travelling solo we have to be able to be self-sufficient when we get stuck. We did opt to delay fitting a winch for a few months however to spread the cost of the fit out over a longer period.
 
Ruby's colour matched bullbar
 
 With the bar work settled on the next decision was what extra lighting to suit; LED light bars and HID lights have become very popular over recent years, and provide excellent lighting. However, for our circumstances, where the vast majority of our travel will be done in the day, and with no intention of using the vehicle for night time off road work we decided that a high quality set of halogen lights would meet our needs. We chose a set of IPF Extreme Sports Lights. I have used these extensively on work vehicles and have been impressed with both the quality of the lights and the durability of the units. The lights have been exactly as we expected and have more than met out needs.


Spot lights and winch
 
Given the long distances we are planning on covering and remote locations that we wanted to see we decided to add a long range fuel tank. Longranger fuel tanks have had an excellent reputation in Australia for many years for proving additional fuel storage capacity without compromising underbody clearance or reliability. The unit available for 76 series Landcruisers holds 176L of fuel, replacing the factory 90L unit; doubling our touring range! One advantage of these systems is that the factory fuel sender pump is retained, with only a small modification to the pick-up being required to complete the installation. This means that the reliability of the original unit is maintained and no further downstream modifications are required in the fuel system.


 Long Ranger fuel tank
 
All 70 series landcruisers come with a factory fitted “raised air intake” basically a snorkel that is designed to let the engine breath air from higher up but is not sealed to prevent water coming into the air box. Safari make a fully sealed replacement for the Toyota unit, which we decided was a sound investment in protecting the engine when undertaking water crossings. There is also the added bonus of getting rid of the ugly Toyota unit! When this modification was completed a small drainage flap in the bottom of the vehicles Air box is also sealed to prevent water entering though this hole. We also extended our diff breathers up into the top of the engine bay to prevent water contaminating our diff oils as the Toyota units end inside the chassis rails.


Safari Snorkel
 
 With the majority of the permanent additional weight now added to the vehicle the team at ARB fitted a set of their Old Man Emu 50mm raised suspension, using their Nitrocharger Sport shock absorbers. We had used this suspension in our Hilux previously (where it replaced another “yellow” brand of suspension that had failed repeatedly, sometimes in very remote locations) and had been very impressed with its performance. We found that while the OME suspension was a little more expensive than some competitors that we knew what we were getting would meet our needs. At the time of fitting a heavy duty (400KG rear 200kg front) spring rate was chosen to ensure that we could carry all of our equipment safely and comfortably. We have subsequently added an extra leaf into the rear spring packs to stop the vehicle sagging when it is fully loaded with the trailer hitched up. When we made the decision to add the extra leaf a lot of research and planning went into choosing this alternative. We considered both air bags and foam helper springs as alternatives, but with both of these alternatives costing around $1000 each (as opposed to $300 to re-pack our existing springs) and with the realisation that our planned load would compensate for the firmer ride from a stiffer spring rate in any case this was a relatively easy decision.
 

Shock absorber and extra leaf spring
 
 Following this work we decided to spend a couple of months getting to know the vehicle better before we did anymore. This let us get a good feel for what did and didn’t work and decide if further additions were justified.

Posted by Mat

Friday 10 January 2014

Camp Oven Chicken Wings

I thought I would start the camp cooking section with one of the yummiest recipes we love to cook in the camp oven - Chicken Wings.  Just delicious.  These were made in our beautiful furphy camp oven.

Camp Oven Chicken Wings

Ingredients
- 1 kg of Chicken Wings
- 1 cup of beer
- 1/2 cup of tomato sauce
- 1/2 cup of BBQ Sauce
- 1 teaspoon of Tabasco sauce

Directions
Marinading
- Combine all ingredients in a bowl or large snap lock bag.  Place in the fridge to marinate for as long as you have.  An hour minimum, but it can be up to a couple of days.  Quite often I marinade my chicken before leaving home and store them in the Engel ready to cook up.

Cooking
- Preheat the camp oven by placing it over the fire to heat up.
- While the oven is heating, prepare a place for the camp oven to sit, to cook the wings.  Place a small shovel of coals on the bottom for the camp oven to sit on.  We do not want the oven to hot, as the marinade contains sugar and can burn.
- Once the oven in preheated, add the chicken wings to the bottom of the oven.  I don't pour in the extra marinade as it can burn.
- Place the lid back on the oven and place 1/2 a shovel of coals on top.
- Let cook for 10-15 minutes.
- Remove lid, turn wings over and baste with extra marinade (not to much though)
- Place oven back on the coals, adding an extra 1/2 a shovel to the bottom if needed (if hard wood you shouldn't need to many more).  Add another 1/2 shovel of fresh coals to the top of the oven.
- Let cook for further 10 minutes.


The fire pit at the campsite


Eating
Carefully remove the wings from the camp oven and enjoy.  These wings are great for lunch or a snack, or an easy dinner.  On the day we served ours with some freshly baked bread that we baked before hand (see next post), with lots of butter.

Delicious!!!!!

Camp Oven Chicken Wings

Wednesday 8 January 2014

Introduction to Ruby

“Ruby” (named for obvious reasons!) is a 2012 VDJ76R Landcruiser Wagon. Ruby was purchased brand new with the intention of turning her into a vehicle capable of taking us safely and reliably on our adventure. For those of you that are familiar with the Toyota 70 series of vehicles (which also includes the Troop Carrier, Single and Dual Cab Ute variants) you will know that they are usually associated with the worksites, farms and mines of Australia.  All 70 Series Landcruisers come with the same 4.5L V8 engine (also shared in twin turbo configuration with the 200 series) and a 5 speed manual gearbox. Anyone who has ridden in one usually describes them as basic and no frills. This was perfect for us when we were looking for a platform to build into a vehicle for long range remote touring.

Ruby is a GXL grade 76 Series meaning she came standard with “luxuries” like power windows, carpeted floors and central locking (all of which are either not available or options on the lower spec 70 series family!). Air conditioning one the other hand remains an “option” for all 70 series Landcruisers (a box which both Jess and I were very quick to tick on the order form!). On the options list (though now standard for all GXL 70’s) were electrically actuated diff locks, which we included to improve the off-road performance (more about our thoughts on this in a later post). We also ordered the vehicle with a genuine Toyota tow bar and stone guards. We chose not to include other genuine Toyota Accessories as they did not suit our needs as closely as many of the aftermarket options available.

After ordering Ruby we settled in for the long wait. From the time of placing the order to picking the vehicle up, there was nearly a 6 month wait. It was almost 4 months after the car was ordered until the build commenced. This gave us the time to privately sell our existing vehicle (a 2008 SR Hilux) privately, which substantially increased the price we got for the car over trading it in with Toyota.

When the time came to finally pick Ruby up, it must be said that the experience was less than fun. The exact date for collection changed several times, due to the tow bar no being available (they had 6 months to get that bit right!) and other minor issues. The dealer we used was 250km from where we live meaning it was an effort to get there and pick it up, my Mum kindly volunteered to drive me to the dealer to collect the car. Once we arrived, there was yet more minor delays while last minute details were arranged, but finally the keys were handed over and it was time to take Ruby home.

Unfortunately this was not to be. 2km out of town and accelerating up past 80km/hr for the first time, a loud whistling noise started coming from the front end of the car. Pulling over to investigate, nothing obvious was wrong, but something clearly wasn’t right. So we turned around and took the vehicle back to the dealer. After 4 hours of searching (and some initial disbelief from the head of the maintenance department that there was anything wrong at all) it was finally discovered that the windscreen was not sealed properly, and that when the car was accelerated past 80kmph that a small amount of air was being forced in though the seals, creating the whistling sound! As it was late in the day the car had to stay overnight to let the sealant/glue cure before it could be driven!
 
Eventually the next day, we did manage to get Ruby home, and then the real fun of building her up as we wanted began!


Ruby when she was picked up from Toyota
  
Posted by Mat

Sunday 5 January 2014

About Us

Well firstly we have to start off by saying that we love Australia, what a great country it is.  To be going on an adventure like ours is a dream come true, we want to explore everything it has to offer.

We decided to call our blog Red Dirt Roaming.  It took us a while to agree upon a name that suited us, but we feel it encompasses everything we are looking to achieve in the next 12 months.

Red dirt is one of the icons of Australia, an image we all come too, when thinking about our vast land and the outback.  It is also where the most exciting adventures happen, especially if you have the ability to get off road!  There is nothing like the sense of freedom that comes when your turn onto a red dirt road and the excitement of thinking about what lies around the next corner.

Roaming is a word that describes how we would like to feel in our lives right now.  According to the dictionary it means "move about or travel aimlessly or unsystematically, especially over a wide area"  it is exactly how we see our trip unfolding, no real plans, just having the freedom to explore as we please.

So a little background of how we got to this places in our lives, that were are ready for our adventure.

We have been together for 13 years, met at boarding school, both went off to University in Brisbane, and then got married in 2008. Mat is 30 and is an environmental engineer, who has worked in the coal mines managing the environment since leaving Uni.  Jess is 29 and grew up on a farm and is an agricultural scientist, who has also been working in the mines in training.

We both have a strong love of the land and enjoy the peace and tranquillity it can provide and have been avid travellers in Australia.  We have done many 1-4 week shorter trips including, Cape York, Tasmania, Simpson Desert, Fraser Island and countless long weekenders throughout a lot of QLD, we have also both travelled a lot as children with our families growing up. 

About 12 months ago we decided that it was time to do a longer trip, and decided to jump right in and take a whole year off work and really see some of the country.  We have been saving our money and making plans ever since.  We will entail to bring you some of the details of all that planning and work in the next 2 months before we leave.  We still have a decent amount to do, but it is starting to get very exciting, the day we leave is getting much closer!


The very large map of Australia in our house that has provided much inspiriation over a few beers in the planning of our trip.

As you will see in our future posts our camping style is a little different to some people. We are all about self sufficiency.  Ideally, we prefer remote, secluded campsites, away from the crowds and are more than happy to go without power and creature comforts.  We know this will be hard to achieve in certain areas of WA, but we hope to bring you some adventures from some of the less well known parts of WA.

We would love for you to join us on our travels, through this blog and welcome any comments to our page.  Our next posts, will look at our 4WD set up and then onto our camper trailer set up.

Posted by Jess

Welcome to Red Dirt Roaming

Welcome to our blog Red Dirt Roaming.  We are currently planning the adventure of a lifetime to travel around Australia in our camper trailer.  We will be quitting our jobs at the end of February 2014 and will hit the road visiting family and friends on the way south and then starting our trip offically in mid-March in Port Augusta.  Intially we will cross the Nullarbor and focus our travels on Western Australia.  Because it is so far away we want to explore WA in detail during the year that we have off, but if we have any extra time, we will expand to other parts of Australia.

This blog will detail everything we have done to get ready and how we have gone about planning for a 12 month trip away.  We will then take you along with us as we travel throughout this great country.

We will have a series of posts on all of our preparations, planning, equipment and set-up, as well as some background information on us, for you in the next 2 months before we get to leave on our adventure.

55 DAYS UNTIL WE LEAVE!!!


Posted by Jess